Cloudn
KUSANAGI for Cloudn is a free virtual machine image built to execute WordPress at high speeds on Cloudn.
System requirements: minimum 4GB memory
How to use KUSANAGI for Cloudn
* This guide assumes you have an account with Cloudn and are able to access the Console. Firefox is recommended.
1. Configure default security group
In the Cloudn Console, click on “Network”. Switch to “Security Groups” under “Select view”. Click on your security group.
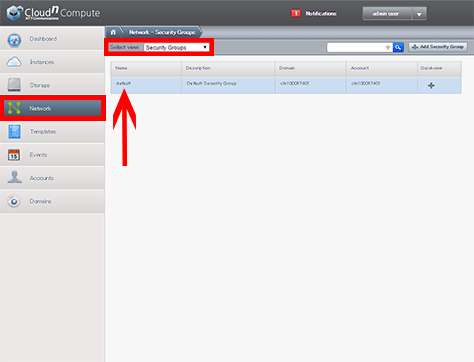
Under the “Ingress Rule” tab, enter exactly as follows and click “Add”. These are the ports for SSH, HTTP, and HTTPS.
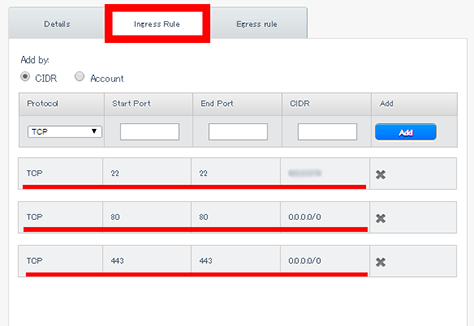
SSH: 22 | 22 | (your IP)/32
HTTP: 80 | 80 | 0.0.0.0/0
HTTPS: 443 | 443 | 0.0.0.0/0
2. Register template
Log in to Cloudn Console and choose your region: JP-EAST, JP-WEST, or US.
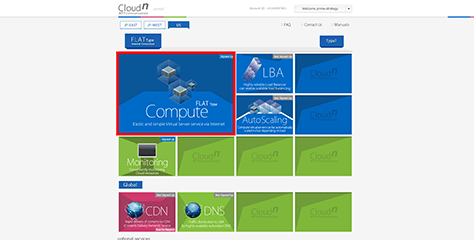
Hover over “FLAT Type Compute” and click “Sign Up Now” (or “Console”).
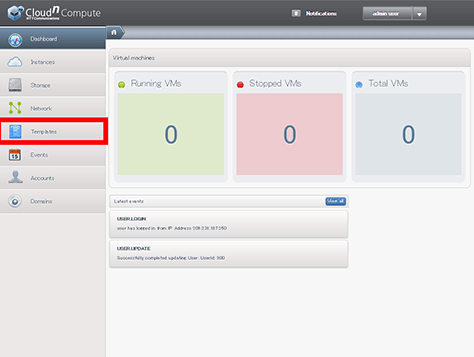
Click “Templates” in the left menu.
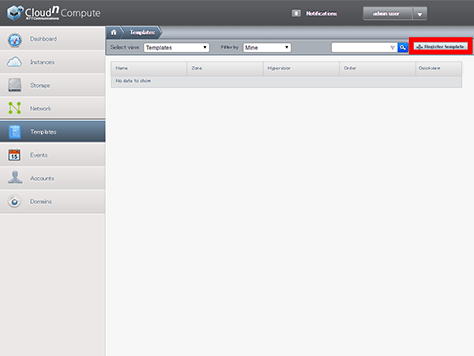
Click “+ Register template” on the top right.
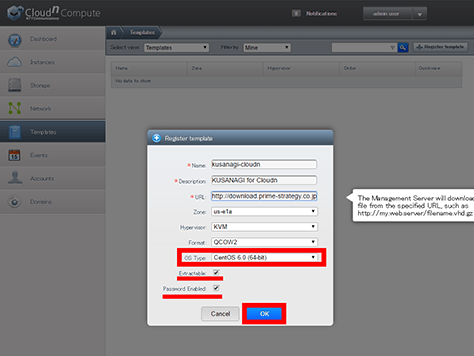
Enter a name and description for your template. Under “URL” enter http://download.prime-strategy.co.jp/kusanagi_cloudn.qcow2
Hypervisor is KVM and format is QCOW2. Change the OS type to CentOS 6.0 (64-bit). Check the boxes for “Extractable” and “Password Enabled”. Click “OK”.
If you click on your template name you will be able to see details. Please wait awhile until the status changes to “Download Complete”.
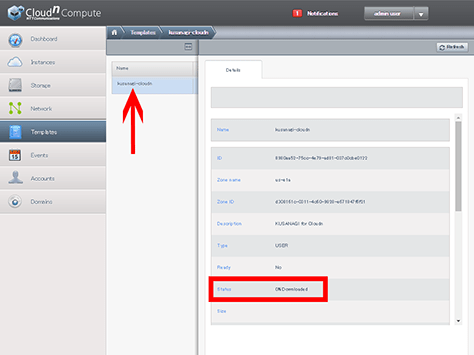
3. Add instance
Click “Instances” in the left menu then “+ Add instance” on the top right.
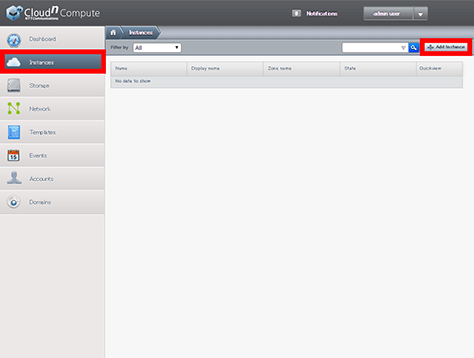
The “Add Instance” screen will display.
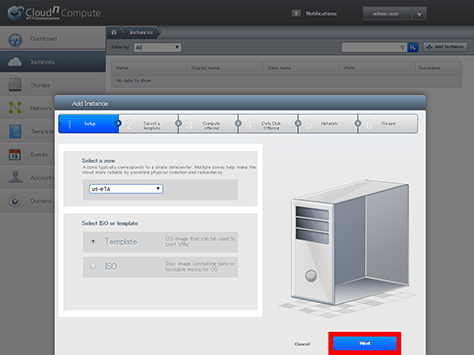
Select a zone and “Template”. Click “Next”.
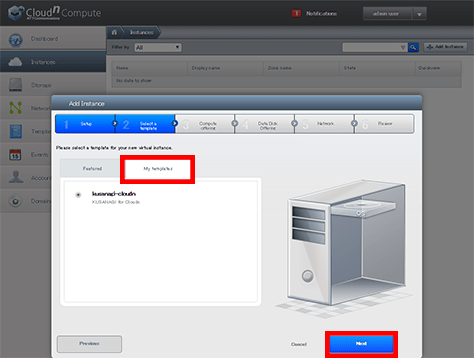
Click on “My templates” then select the KUSANAGI template you created. Click “Next”.
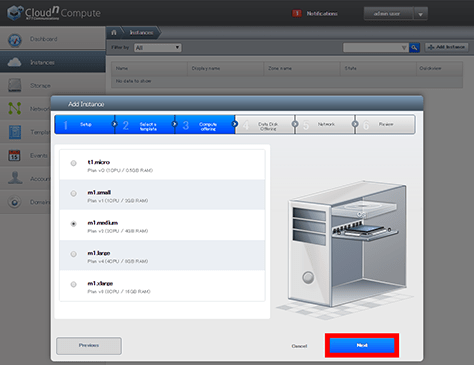
Select your compute size (KUSANAGI require at least 4GB of memory). Click “Next”.
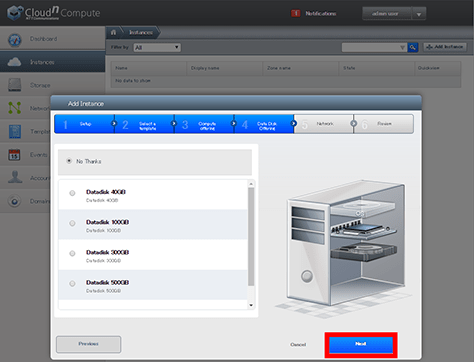
Select a datadisk or “No thanks”. Click “Next”.
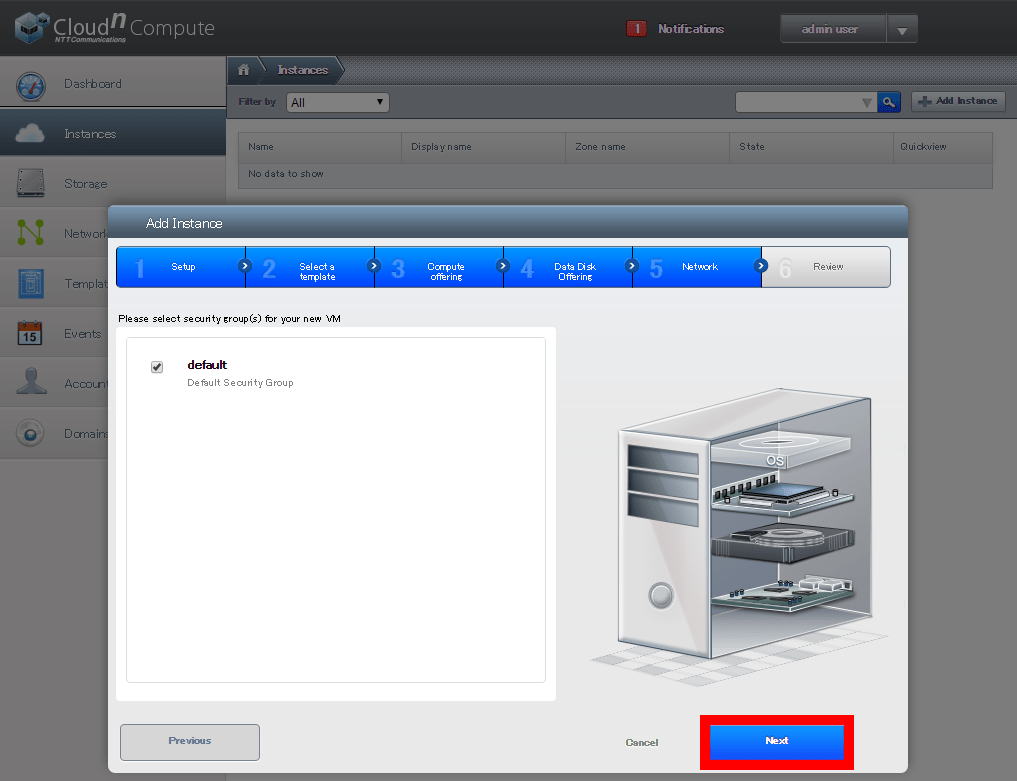
Select a security group. Click “Next”.
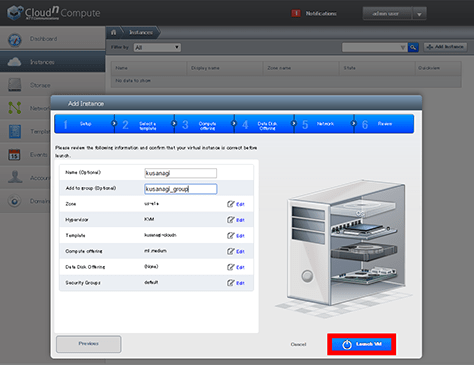
Enter an optional name and group then click “Launch VM”.
Once launched, a popup will appear with your root password. Please make note of it.
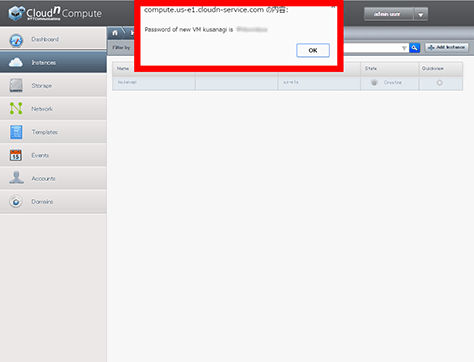
Click “OK” and please wait.
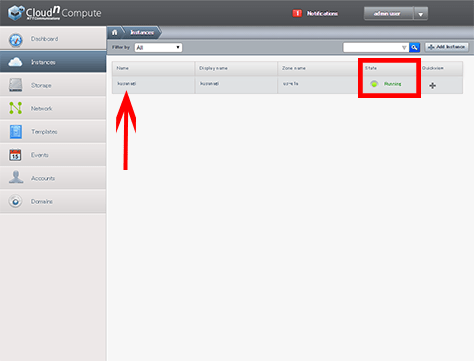
When the state changes to “Running”, your virtual machine is finished launching.
4. Confirm your IP address
Click on the name of your virtual machine to see its details.
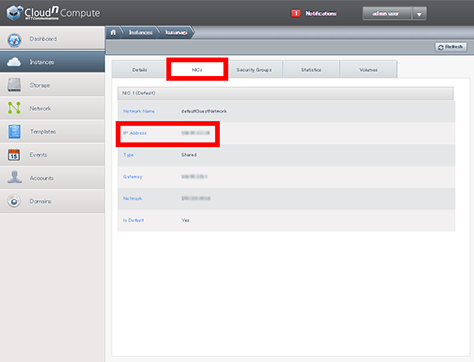
Click the “NICs” tab and make note of the IP address. It will be used to log in.
5. Log in to the virtual machine and prepare for initialization
Below we will explain how to log in to your virtual machine in preparation for initialization.
a. Log in via SSH
Using an SSH client such as Poderosa or other terminal software, log in to your virtual machine.
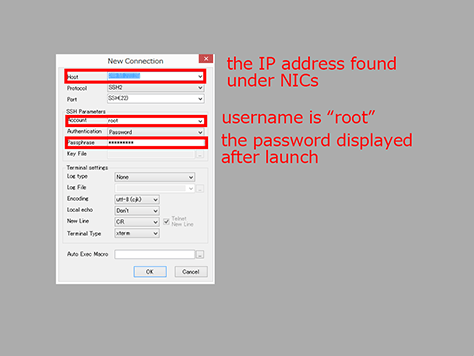
The host name is the IP address, and your password was shown in the popup. Use “root” as the username.
Once the login is successful, the following screen will display.
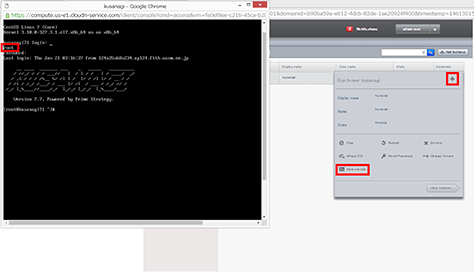
b. Log in via Cloudn Console
Alternately you can log in via the Console.
Hover over the “+” on the right side of your virtual machine, and click “View console”. Enter “root” at the prompt and then your password.
For instructions on initialization please see the following guide.

