
KUSANAGI 9 for VMware is a free virtual machine image that runs at high-speed WordPress and other CMSs for VMware, Inc.
The free version of KUSANAGI can be upgraded to the "Business Edition" for business use, or to the "Premium Edition", a top-of-the-line edition equipped with a web acceleration engine.
For more information on upgrades, please refer to the following link.
KUSANAGI Editions
Introduction
VMware Supported Products
KUSANAGI 9 for VMware has been tested in the following two environments.
- VMware Workstation 17 Pro
- VMware ESXi Version 7.0
KUSANAGI 9 for OVA Image Compatibility Information
KUSANAGI 9 is compatible with the virtual hardware version 7.
- ESXi
- ESXi 8.0
- ESXi 7.0 U2 (7.0.2)
- ESXi 7.0 U1 (7.0.1)
- ESXi 7.0
- ESXi 6.9.1
- ESXi 6.8.7
- ESXi 6.7 U2
- ESXi 6.5
- ESXi 6.0
- ESXi 5.5
- ESXi 5.1
- ESXi 5.0
- ESXi 4.x
- Workstation Pro/Player
- Workstation Pro 17.x
- Workstation Player 17.x
- Workstation Pro 16.x
- Workstation Player 16.x
- Workstation Pro 15.x
- Workstation Player 15.x
- Workstation Pro 14.x
- Workstation Player 14.x
- Workstation Pro 12.x
- Workstation Player 12.x
- Workstation 11.x
- Player 7.x
- Workstation 10.x
- Player 6.x
- Workstation 9.x
- Player 5.x
- Workstation 8.x
- Player 4.x
- Workstation 7.x
- Workstation 6.5.x
- Player 3.x
- Fusion
- Fusion 13.x
- Fusion 12.x
- Fusion 11.x
- Fusion 10.x
- Fusion 8.x
- Fusion 7.x
- Fusion 6.x
- Fusion 5.x
- Fusion 4.x
- Fusion 3.x
- Fusion 2.x
- Other
- Server 2.x
Reference: Virtual machine hardware version (1003746)
How to use KUSANAGI 9 for VMware
How to use VMware Workstation Pro
How to use VMware ESXi
How to use VMware Workstation Pro
- Download KUSANAGI 9 for OVA image
- Import OVA image
- Set Up the Virtual Machine
- Launch the Virtual Machine
Below are the steps for the Windows version.
Download KUSANAGI 9 for OVA Image
From the Prime Strategy website download the virtual machine image you want to start up.
Downloading KUSANAGI 9 for OVA Image
To use KUSANAGI 9, follow these steps. Download KUSANAGI 9 for OVA image from the link below.
CentOS Stream 8:
https://download.prime-strategy.co.jp/VMware_CentOSStream8_64_kusanagi9.4.2403.ova
CentOS Stream 9:
https://download.prime-strategy.co.jp/VMware_CentOSStream9_64_kusanagi9.4.2403.ova
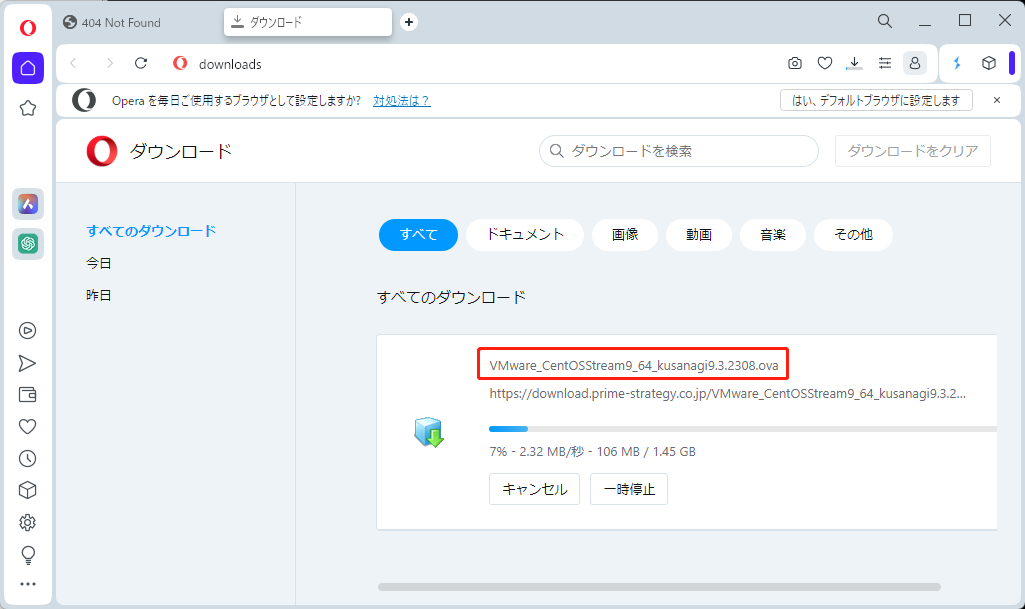
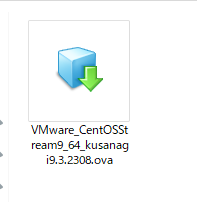
Make sure that there's a file with the extension "ova".

Import OVA image
First, start-up VMware Workstation Pro, then select File->Open.
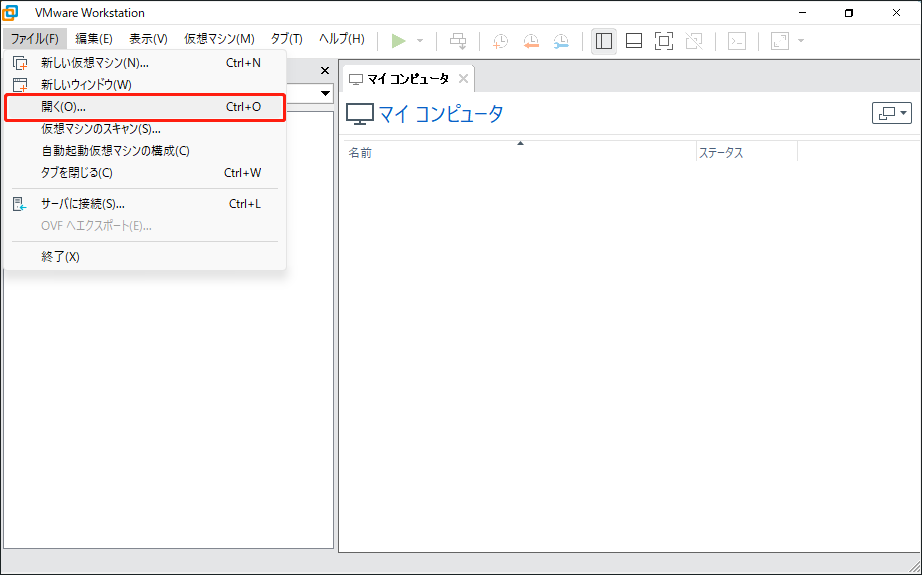
Select the KUSANAGI for OVA image that you downloaded.

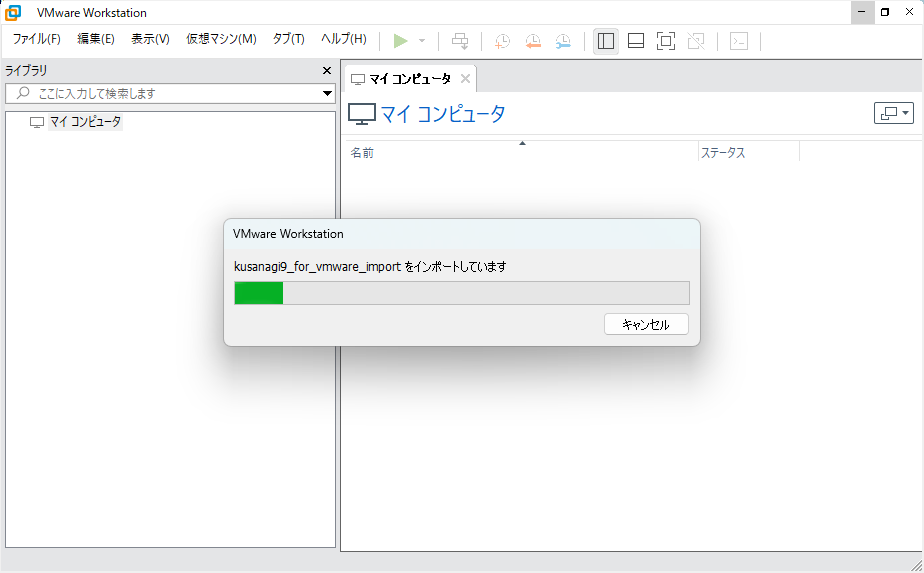
Enter the name of the virtual machine and the storage path for the virtual machine.

Import the OVA image. The creation of the virtual machine is now complete.
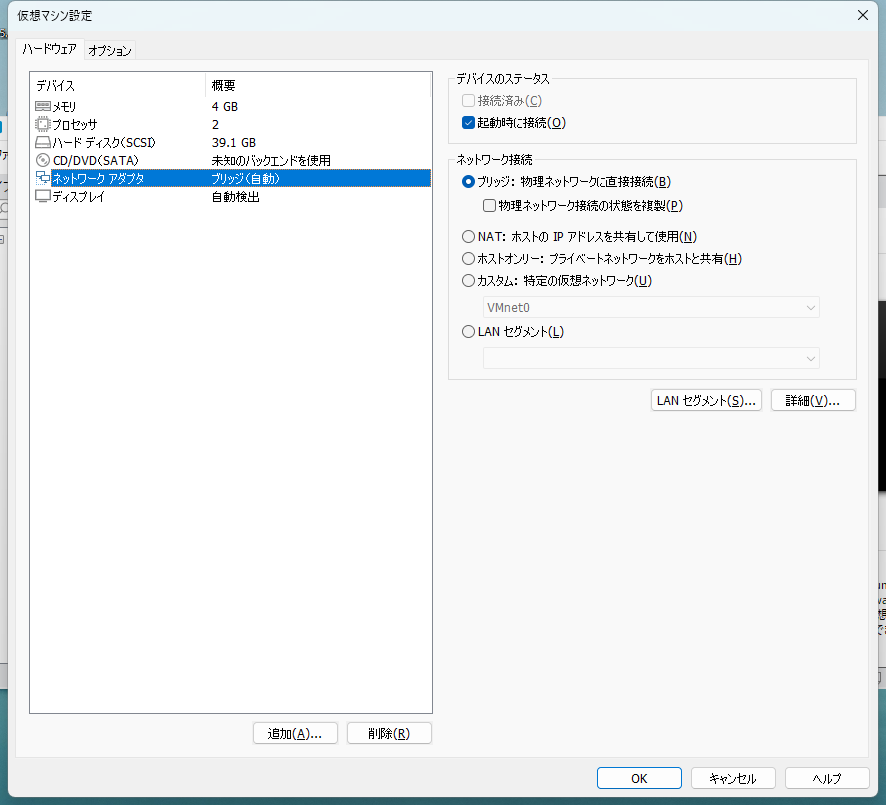
Set Up the Virtual Machine
Next, set the environment for the imported virtual machine. To open the virtual machine settings, go to Network Adapters->Network Connections and select the network connection that best fits your environment.
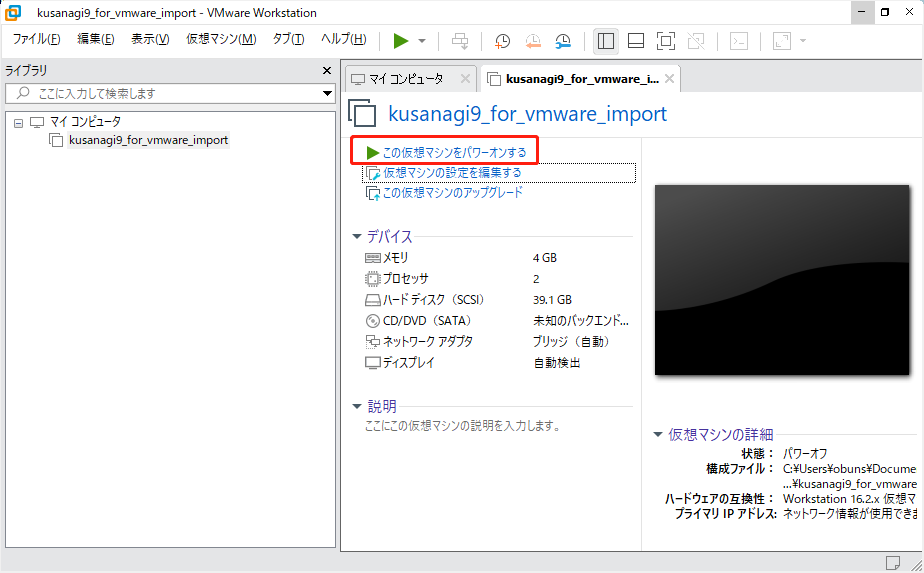
Launch the Virtual Machine
Turn on the virtual machine and start the virtual machine.
How to use VMware ESXi
- Download KUSANAGI 9 for OVA Image
- Log in to VMware ESXi
- Create a Virtual Machine
- Launch the Virtual Machine
Below are the steps for the Windows version.
Download KUSANAGI 9 for OVA Image
From the Prime Strategy website download the virtual machine image you want to start up.
Downloading KUSANAGI 9 for OVA Image
To use KUSANAGI 9, follow these steps. Download KUSANAGI 9 for OVA image from the link below.
CentOS Stream 8:
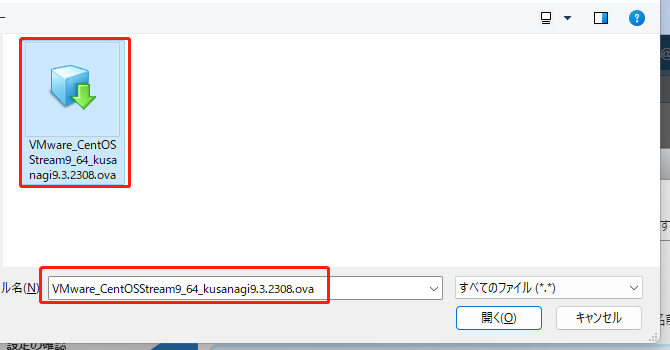
https://download.prime-strategy.co.jp/VMware_CentOSStream8_64_kusanagi9.3.2308.ova
CentOS Stream 9:
https://download.prime-strategy.co.jp/VMware_CentOSStream9_64_kusanagi9.3.2308.ova

Make sure that there's a file with the extension "ova".
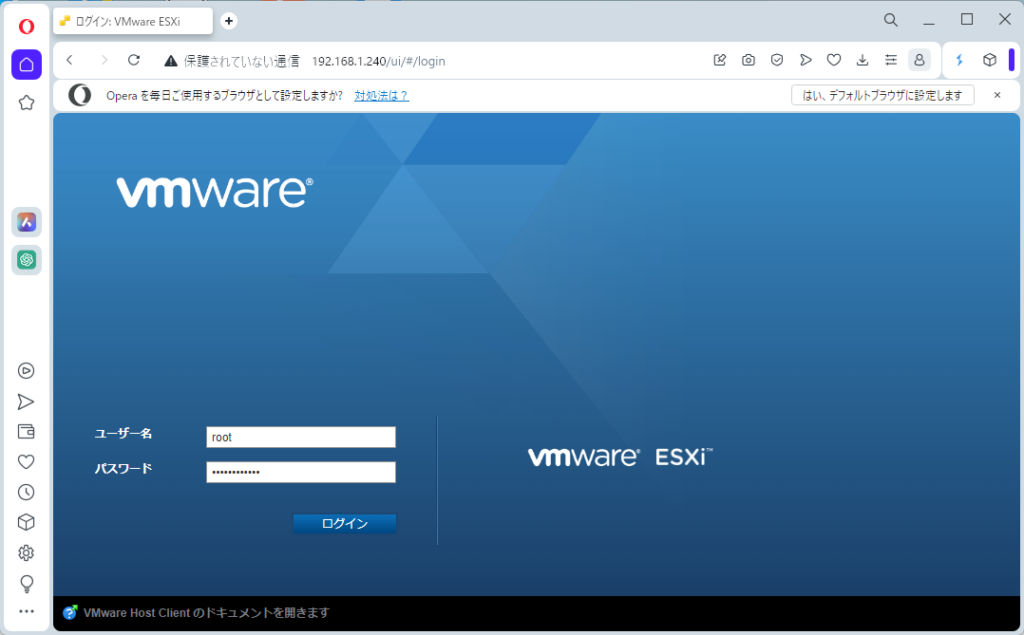
Log in to VMware ESXi
Log in to VMware ESXi from your browser.
Create a Virtual Machine
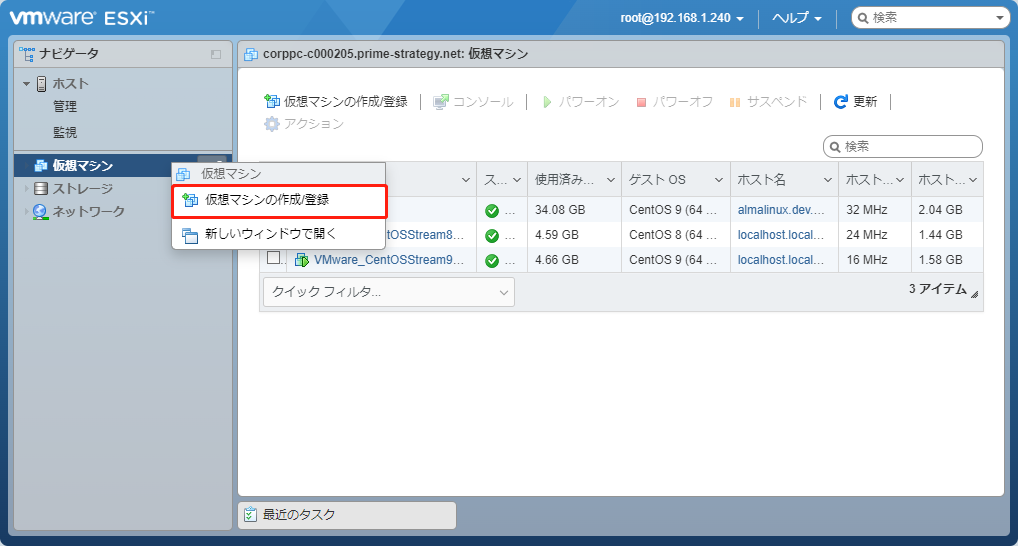
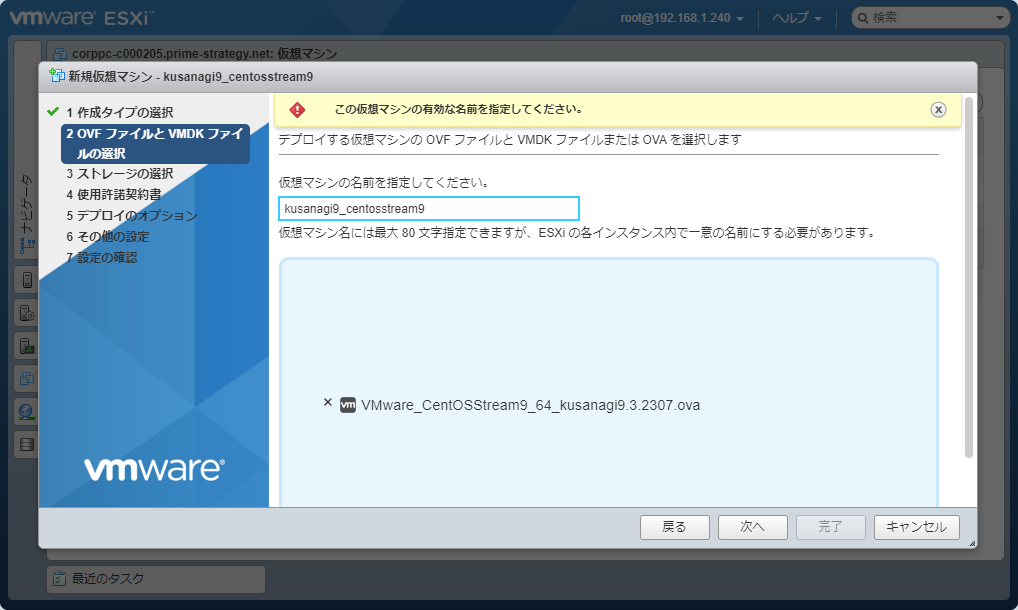
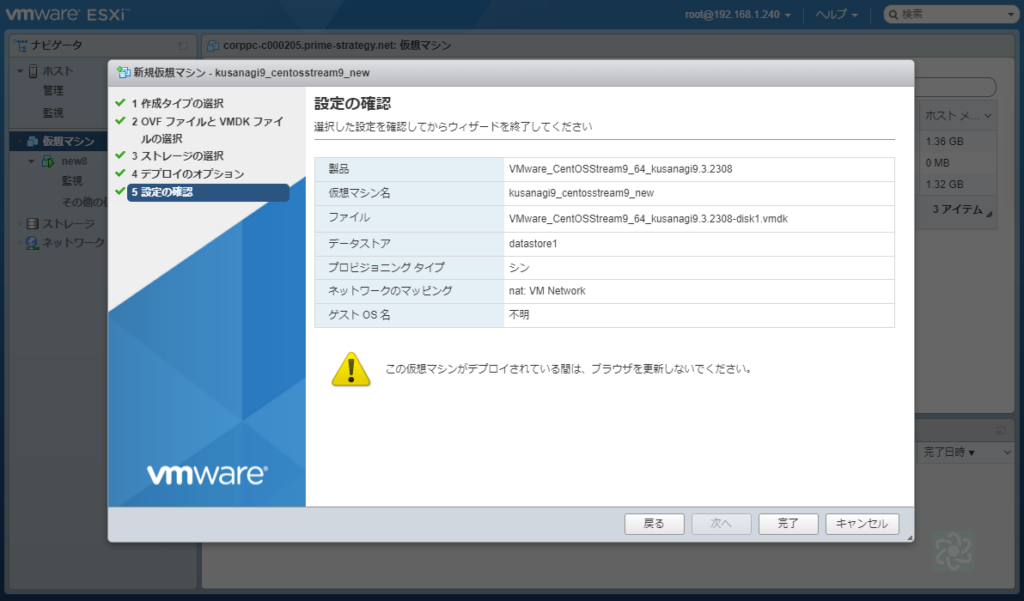
On the VMware ESXi screen, select Virtual Machine -> Create/Register Virtual Machine.
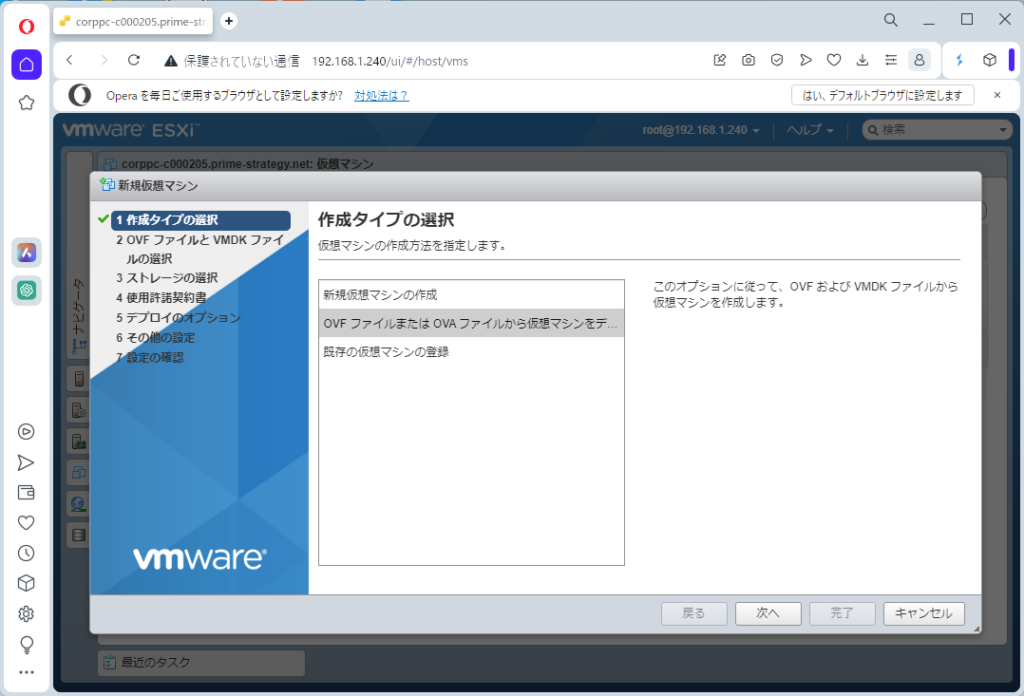
On the "VM Type" screen, select "Deploy virtual machine from OVF file or OVA file".
On the OVF and VMDK file selection screen, upload the OVA image you just downloaded.
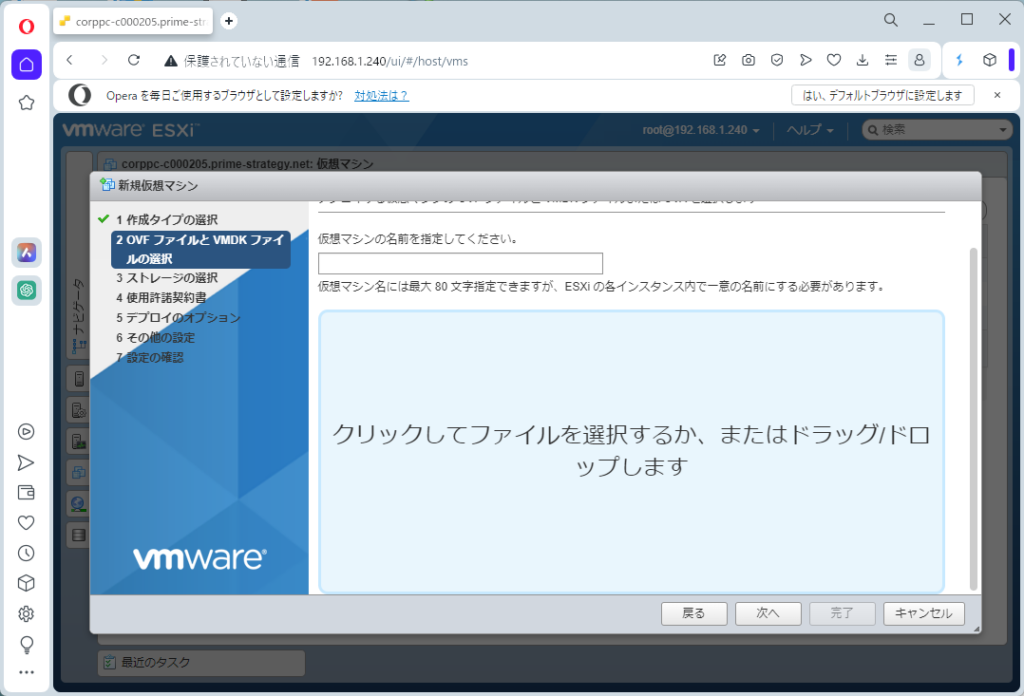
Specify the virtual machine name as well.
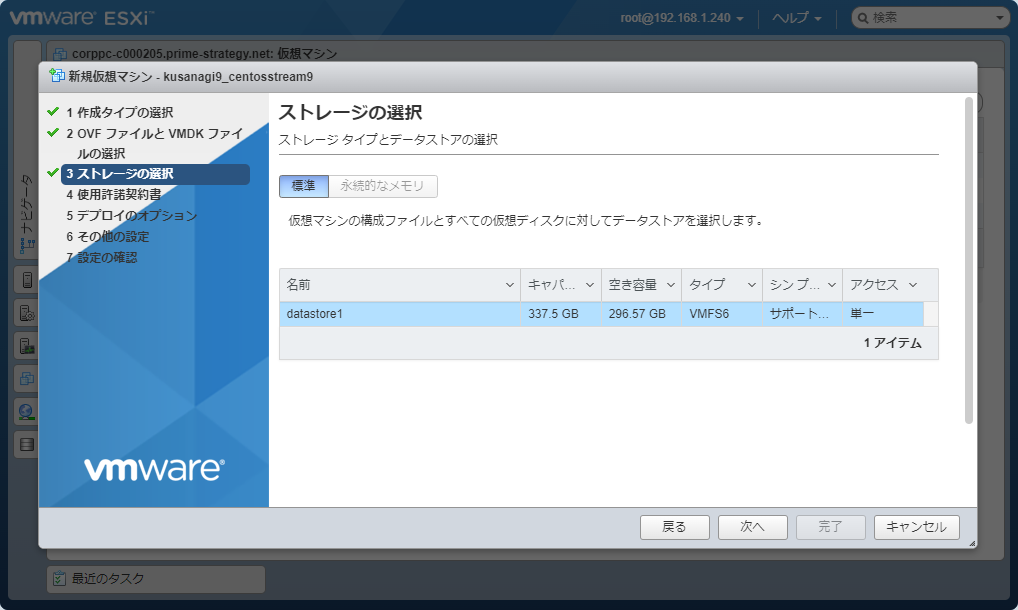
On the VM storage screen, set the name and the amount of space for your environment.
In "Deployment options", set the following.
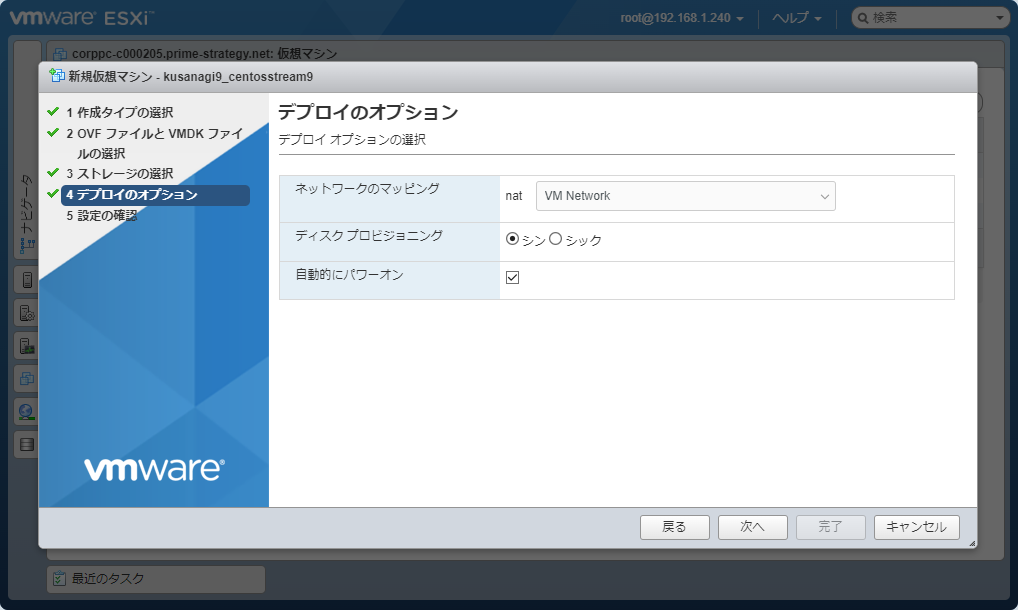
For "Network Mapping", select a network you want to join.
For "Disk Provisioning", you can choose one of two choices, thin or thick (see below).
For "Automatic Power-On", either check or un-check the box.
- Thin: Allocates only the minimum amount of space when creating a virtual disk and increases it as needed.
- Thick: Allocates space for the size specified when creating the virtual disk.
After reviewing the settings, click "Finish" to create the virtual machine.
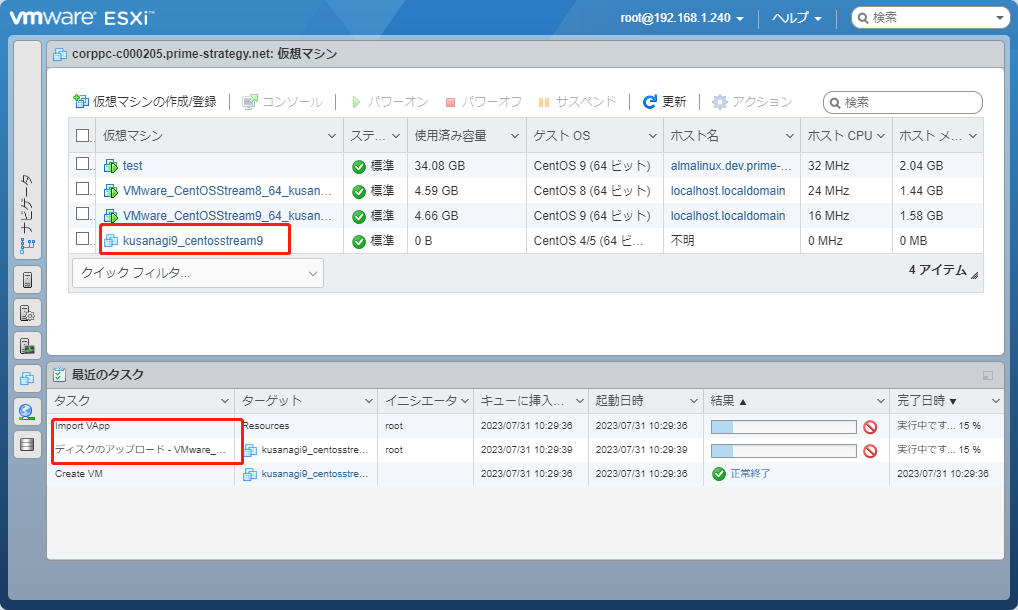
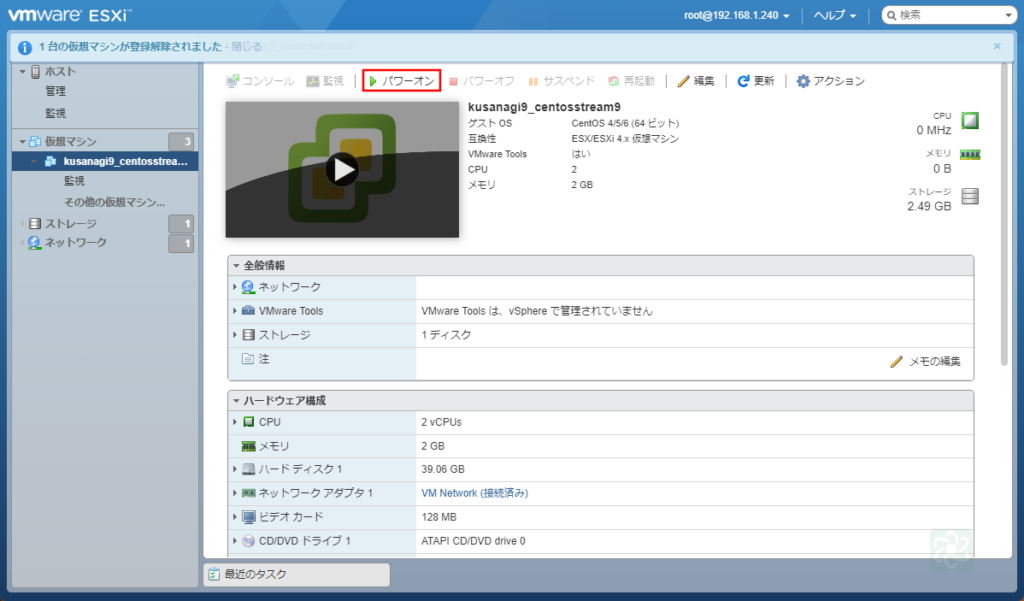
Launch the Virtual Machine
If you checked the "Automatic Power-On" box in the previous step when creating the virtual machine, the virtual machine should be already up and running. If it was left un-checked, you will need to click "Power on" to start the virtual machine.
Prepare for Initial Setup
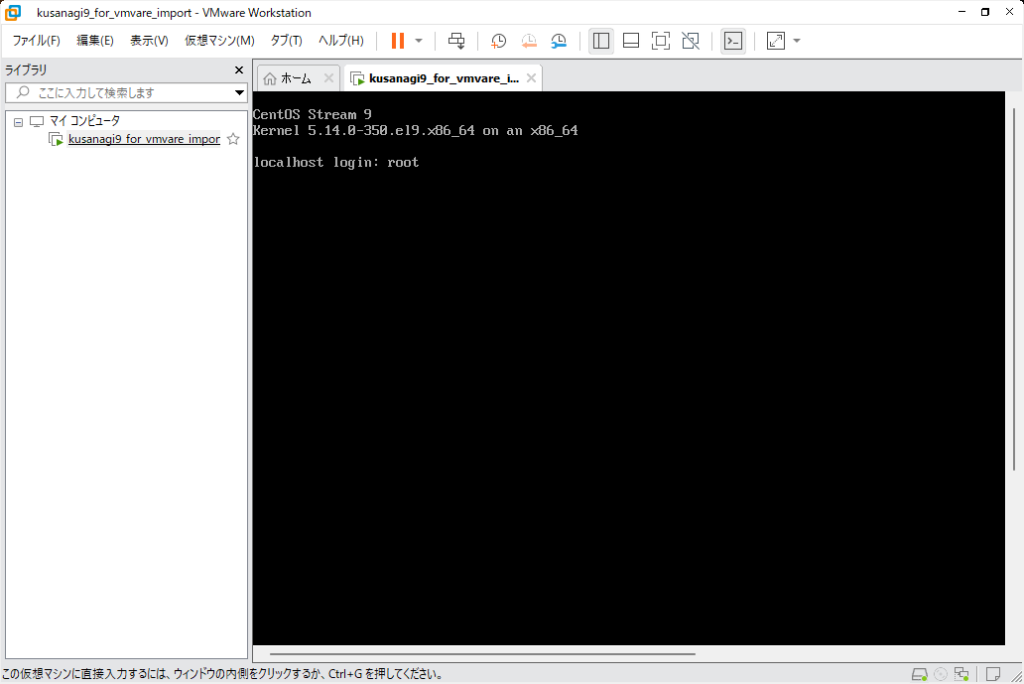
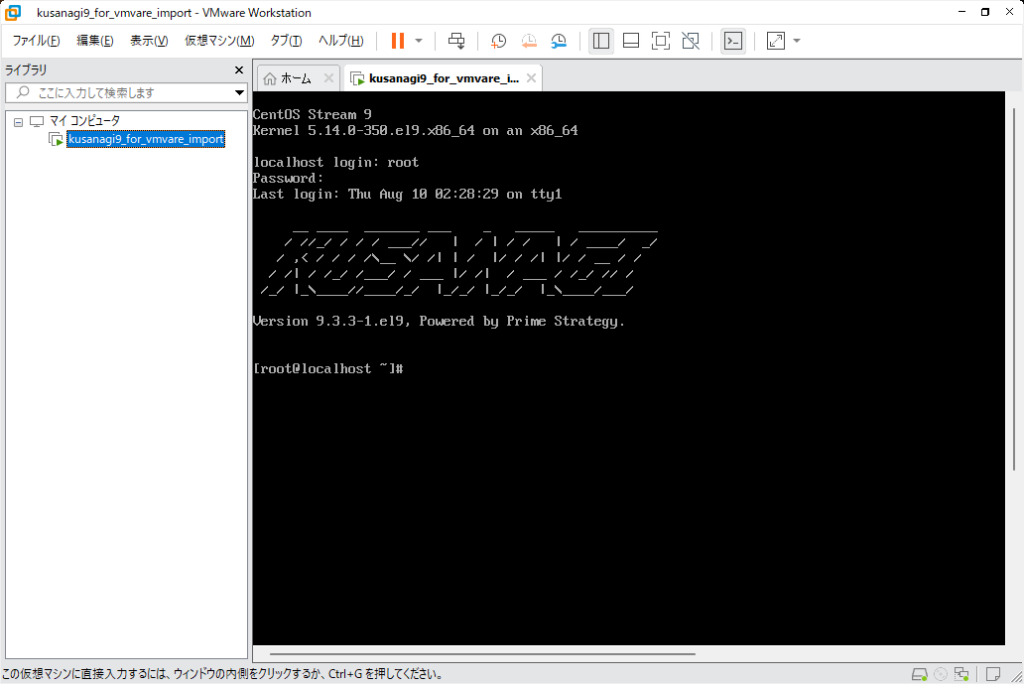
Logging In to the Virtual Machine
Log in to the virtual machine using the appropriate console.
For VMware Workstation Pro:
For vSphere ESXi:
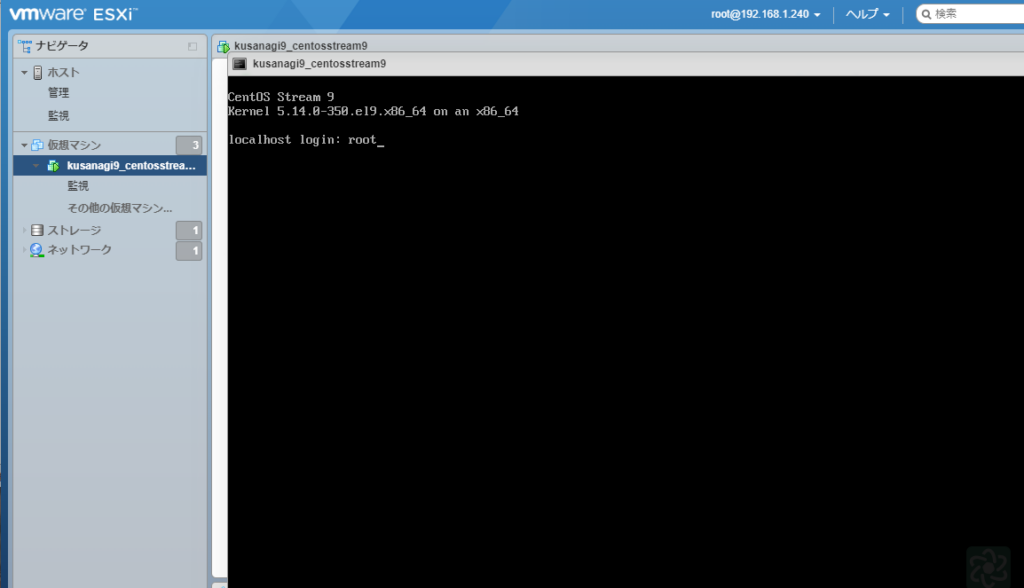
The following is set as the initial "root" password, so use this to log in as the "root" user.
Initial root password: 4XhXygXW9nAdisDb
Be sure to change the password for the "root" user using the "passwd" command.
# passwd
Changing password for user root.
New password: (new password)
Retype new password: (new password)
passwd: all authentication tokens updated successfully.
Configure the network settings according to your environment using the "nmcli" commands, etc.
When the network settings are complete, you can log in using the "ssh" command or SSH client. If you want to log in using an SSH client on Windows, please refer to the following document.
Log in to KUSANAGI 9 with Windows "ssh"
The host name is the IP address set above, the user name is "root", and the password is the password you reset.
If the log-in is successful, you will see the following screen.
For further steps, please follow the instructions below.
If you are using KUSANAGI 9 for VMware, please refer to the link below.
KUSANAGI 9 Quick Start
Important Point
- This applies to those who downloaded "VMware_CentOSStream8_64_kusanagi9.3.2308.ova" or "VMware_CentOSStream9_64_kusanagi9.3.2308.ova" before August 21, 2023.
KUSANAGI 9 for VMware allows "ssh" login as the "root" user. We recommend that you set the "PermitRootLogin" value in "/etc/ssh/sshd_config" to "no" to prevent "ssh" login as the "root" user.
Below is an example command of how to change the setting.
# sed -ie 's/^PermitRootLogin yes/PermitRootLogin no/' /etc/ssh/sshd_config
# systemctl restart sshd
How to Access the VMware Website (Guest OS)
After following the above steps to initialize and provision KUSANAGI, you can now configure the host OS (Windows) by entering the following in the "hosts" file. The KUSANAGI site built on the guest OS can be viewed from the web browser of the host OS (Windows) by entering the following in the "hosts" file.
Example
Virtual machine IP address set using "nmcli" command etc.: 192.168.123.193
FQDN name specified during "kusanagi provision": kusanagi9-for-vmware-test.co.jp
192.168.123.193 kusanagi9-for-vmware-test.co.jpNote:
This setting is only for when the virtual machine is directly connected to an external network. It cannot be used when network address translation (NAT) is used.

