Install WordPress with CentOS
Log in to your instance using an SSH terminal client such as Poderosa. The host name is your Elastic IP address or your public DNS (such as ec2-xxx.ap-xxx.compute.amazonaws.com), the user name is “centos”, and the authentication type is “public key”. Upload your key pair .pem file.
Once you have connected, update the OS.
[centos@ip ~]$ sudo su -
[root@ip ~]# yum update -y
Next, you will install the minimum packages needed to launch WordPress. These modules and programs are Apache 2.4, MariaDB 5.5, PHP 5.4, php-mbstring, wget, and unzip.
[root@ip ~]# yum install httpd php php-mysqlnd php-gd php-xml php-xmlrpc php-mbstring php-mcrypt mariadb-server wget unzip -y
Temporarily disable selinux.
[root@ip ~]# setenforce 0
In order to keep selinux disabled even if you restart your SSH connection, edit the file “/etc/selinux/config” using vim, change the line “SELINUX=enforcing” to “SELINUX=disabled” and save your changes.
If you are not using AWS, firewalld may be installed. Please disable firewalld as well. If you do not disable selinux and firewalld, you might be denied port 80 HTTP access and server file system writing.
Before starting Apache, you must edit httpd.conf to allow WordPress’ permalink function to work. Open “/etc/httpd/conf/httpd.conf” and change the line “AllowOverride None” to “AllowOverride All” (about line 151) for the directory “/var/www/html”. Save your changes. With this setting, WordPress will be able to create the .htaccess file when it is installed.
Next, start Apache 2.4 and MariaDB 5.5.
[root@ip ~]# systemctl enable httpd
[root@ip ~]# systemctl enable mariadb
[root@ip ~]# systemctl start httpd
[root@ip ~]# systemctl start mariadb
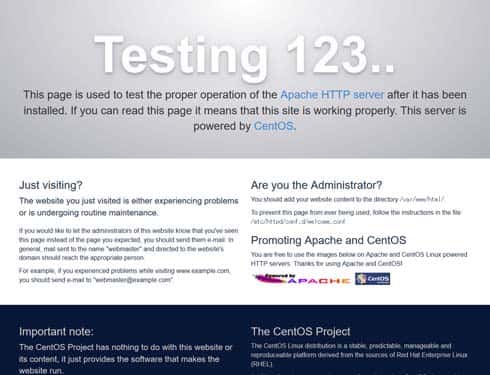
Enter your public DNS (such as ec2-xxx.ap-xxx.compute.amazonaws.com) into a browser to be greeted with the Apache welcome screen.

Next, you will initialize MariaDB and create a database and its user. Enter the command “mysql_secure_installation”. You will be asked for a password if you set a password for the root user.
[root@ip ~]# mysql_secure_installation
Log in to MariaDB.
[root@ip-172-30-1-150 ~]# mysql -uroot -p
Enter the following to create your database. Use “wordpress” for the database name, “localhost” for the host name, “wpuser” for the database user, and “wppass” for the database password.
MariaDB [(none)]> create database wordpress;
MariaDB [(none)]> grant all privileges on wordpress.* to wpuser@localhost identified by 'wppass';
MariaDB [(none)]> flush privileges;
MariaDB [(none)]> exit;
Next, you will download WordPress and unzip it into “/var/www/html”, then temporarily change the permissions of “/var/html” and “/var/html/wp-content”. In this article we are using root user with “/var/www/html” as the document root, but please change the directory and user as you need.
[root@ip ~]# cd /var/www/
[root@ip www]# wget https://en-gb.wordpress.org/wordpress-4.5.2-en_GB.zip
[root@ip www]# unzip wordpress-4.5.2-en_GB.zip
[root@ip www]# cp -rp wordpress/* html/
[root@ip www]# chmod 777 html html/wp-content
If you return to your site and refresh the page, WordPress installation will begin. Follow the wizard to install. Once finished, display the front page.
